Thursday, October 14, 2010

Pleated Pillow Plus…

About 6 weeks ago, my husband came home from work asking me if I was willing to do a little sewing for someone that he worked with who wanted some pillows made.  I thought “pillows?” “they’re a snap!”.  Ha.  Little did I know that the day I started them my machine would decide to break and become totally unusable.  We ended up at the shop twice and then gave up and bought a totally new machine. 

We went with a simple Bernette 66 for Bernina that hopefully will last for years to come.  I really loved the service at the store those ladies were all so nice to me, besides the other perks (such as warranty and free maintenance/cleaning for a year…etc). My machine also came with three classes which I learned some amazing tips from such as: Make sure you thread your machine’s upper thread with the foot down because this sets the tension properly….this is one trick I still need to master.  Also, only turn the side needle-positioner wheel (whatever it’s really called) towards you and  never away as this messes up tension too.  I never knew!  I am sewing better than ever! I’m also thrilled with the foot power that I know have from the courses I took.  I was so excited to start on the pillows that I was supposed to make in this material that I LOVE!  I took the courses before starting and I’m so glad I did.  This was a pretty fun project though a little nerve racking trying to make them perfect for the girl I was making them for :).

Here’s a photo of what they look like in her cute newly-decorated apartment that she sent me.  I also designed the middle pillow myself because she wanted a more embellished pillow but not too crazy.  I love how they turned out!

001[1]

When we were picking out supplies she also asked my advice on what to do for a flower arrangement.  I was so flattered that anyone would ask my advice on anything…it was a nice feeling.  This was my suggestion for the flowers…she thought of filling the jar with beans which I love and suggested she paint them.  It looks awesome!002[2]

Thursday, August 26, 2010

First Fondant Cake

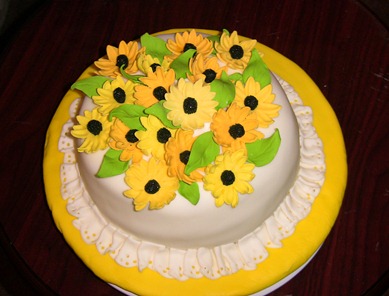
I finished my fondant and gum paste class at Michael’s last night.  I’m pretty pleased how my cake turned out.  It is white with yellow black-eyed Susan’s on it.  I’m really glad I decided to add the leaves because I think they give it a lot of movement plus a more whimsical feel.  I really like the “eyelet” ruffle I did on it to.  It makes seem kind of vintage or something.  My teacher seemed pretty pleased with it and took tons of photos…maybe to do something similar?  Anyway,  I’ve always been so terrified of fondant before taking this class. I’m glad that I no longer am nervous of it.  In fact I just wish I had more time to do cakes!  It’s not perfect, but I’m pretty pleased!013

My Susan Cake

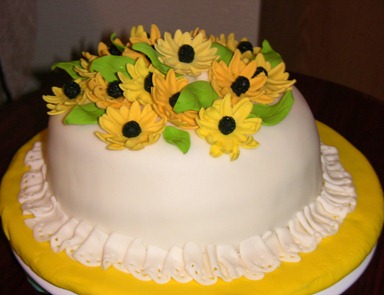
020 

Side view.  Those eyelets can use a little more work but they are slightly tedious…especially trying to do them before the fondant dries out.

Monday, August 23, 2010

Cheap Baby-Doll Bed

If you ask my son what he wants to be when he grows up, he will tell you quite frankly “I want to be a daddy!”  He loves babies and kids and he’s always asking if we can have 20 kids in our family…of course my response is always “Nope!”  He has a baby doll that he got when he was almost two and in that stage where all that little toddlers love babies. 

When his baby sister was born last December, my mom came to visit laden with matching items such as blankets and pajamas for his baby sister and his baby doll.  It was very thoughtful of her.

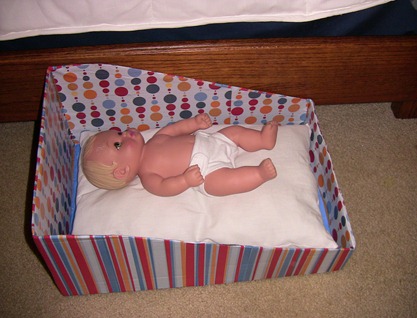
There have been many times when my laundry baskets have been confiscated by Christian to use as his baby’s bed.  Until one day after a visit to Sam’s Club when I realized that one of those dumb half/cardboard box things they give you to load your giant items into was about the perfect size and shape for a baby bed.

So, Christian picked some paper that he liked and I modge-podged (sp?) the thing and made a cushion.  Now it’s a very cheap baby bed that I won’t feel guilty about discarding when his love of his baby doll has bid its last farewell and I can use the cushion as a toddler pillow for one of his sibling(s)…

009

Felt Choosing Cubes

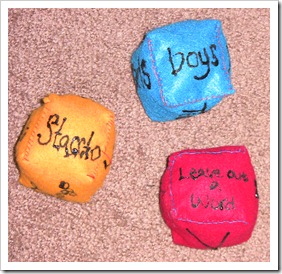
(This past 3 months!) I’ve been subbing for the Primary Chorister.  I made these little cubes to try to motivate the children in Primary to #1 be quite so I would pick them #2 have reasons/variations to repeat a song and #3 because felt does not get destroyed as fast as paper does  and #4 it’s a sneaky way to teach musical terms. 

You could use these cubes for other motivation, such as which chore to pick for the day or what kind of activity to do when your children are arguing…there are so many possibilities!

002

The kids LOVE it when I pull these out!  So glad I came up with them!

Here are some of the different things I put on them:

Red:

Leave out a word

crescendo (grow louder)

decrescendo (grow softer)

fermata (hold a note)

rall.  (slow down)

accelerando (speed up)

Yellow:

Staccato (short and bouncy)

Largo (smooth)

Legato (slow)

Forte (loud)

piano (soft)

allegro (fast)

Blue:

Boys only

Girls only

Right side (of room)

Left side (of room)

No teachers

Hum

Cheap Baby-Doll Bed

If you ask my son what he wants to be when he grows up, he will tell you quite frankly “I want to be a daddy!”  He loves babies and kids and he’s always asking if we can have 20 kids in our family…of course my response is always “Nope!”  He has a baby doll that he got when he was almost two and in that stage where all that little toddlers love babies. 

When his baby sister was born last December, my mom came to visit laden with matching items such as blankets and pajamas for his baby sister and his baby doll.  It was very thoughtful of her.

There have been many times when my laundry baskets have been confiscated by Christian to use as his baby’s bed.  Until one day after a visit to Sam’s Club when I realized that one of those dumb half/cardboard box things they give you to load your giant items into was about the perfect size and shape for a baby bed.

So, Christian picked some paper that he liked and I mod-podged  the thing and made a cushion.  Now it’s a very cheap baby bed that I won’t feel guilty about discarding when his love of his baby doll has bid its last farewell and I can use the cushion as a toddler pillow for one of his sibling(s)…

009

Tuesday, August 3, 2010

First Royal-Icing Flower Cake

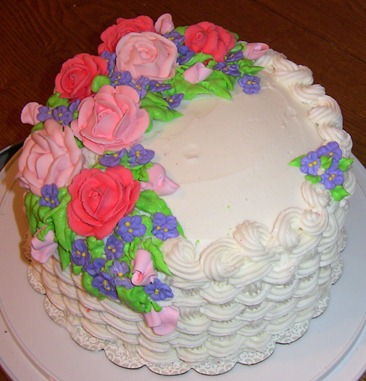
I finished my Cake Flowers and Design class at Michaels last week.  Here is my finished product:

IMG_5409

I’m getting better at piping flowers though it sure has its own learning curve.  I thought I’d go crazy in class when the teacher first showed us how to do it.  So, I went to the Wilton site and found some tutorials.  Hurray for tutorials!  Christian thought it was really weird that I was watching a movie that wasn’t a real movie…it was women talking and holding bags of icing…  It really helped me.  That’s for sure.

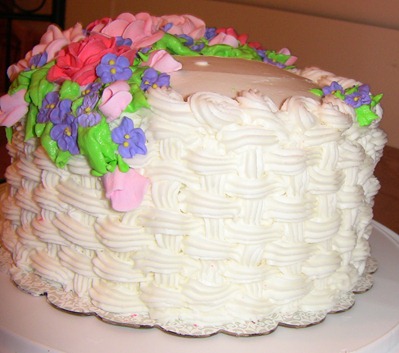
IMG_5410

Here’s the side of the cake with the basket-weave pattern.  I think it looks okay.  I would like it to be better though.  I guess I just need to practice some more.  Jared’s work will be pleased.  They were very happy when I made Jared take this cake with him.  Thank goodness.  Who wants to eat their own creation?

Thursday, July 15, 2010

Grey Ruffled Dress…

In July we had a wedding up in Utah to attend for my cousin.  I needed something to wear that would fit me, be cool in the heat, and be appropriate for a wedding. 

After spending some time looking at dresses and not really fitting anything (my post-pregnancy body is a little more "hippy" than usual) I decided to try my hand at making my own dress. I pulled out one of my favorite patterns that I tried and never was happy with the results. Then I headed to Wal-Mart (The only store with fabric that was open within a 10-mile radius) and picked up a remnant of some grey cotton material that had some stretch to it.

I decided to add a ruffle to it ass a lot of dresses right now have ruffles and little fun feminine details and I wanted to be special too (besides the fact that the ruffle made the dress a little more modest was a bonus).


Here I am at the wedding…

Utah Trip June 29-July 5 324

It turned out pretty nice I think.  After the wedding my sister sent me a link to this dress to show me how similar they are.  It only cost me about $5 to make this dress… that’s a little better than $130 don’t you think so?

Monday, June 14, 2010

Let them eat cake….

As some of you may know, I’ve started taking a cake class at our local Michaels.  Around Mother’s day I was really depressed and lonely feeling.  Jared and I decided that I need to have more to think about than the in-and-out day-to-day mommy things and do something that is for me.  Of course we both are school addicts.  For me at least I think it’s the feeling of accomplishment I get while I’m working on a course as well as the challenge of staying organized and getting assignments completed.  I didn’t necessarily want to take a college course though with the way those are priced.  Since I enjoy crafting and sewing we called the local Michaels to see what classes were available.

The only ones offered at that time were Cake decorating classes.

Honestly, I make the UGLIEST cakes known to man, woman and children kind.  They taste great but they lack in the looks department.  Part of this may be that I don’t like frosting.  I scrape it off to the utmost bare minimum because I really hate the taste of it.  When I decorate a cake I’ve always tried to keep it as thin as possible.  Well, those days are over.

I’ve decided that this is the best time in my life to practice decorating.  Vivian is almost 6 months, I will take the three courses offered over the next 3 months and (hopefully) by the time her birthday rolls around I can make her a cake that is not only delicious but nice to look at (at least until we eat it).

Jared went into Michaels with me a few days later and we signed up for my class and got the supplies listed by the instructor.  I was honestly a little shocked (and still am) over the lack of complaints about price from Jared.  I knew it was going to be expensive but I didn’t know if he comprehended it.

I took my first class last Wednesday.  I got really excited when she told us that to make black icing it’s best to start with chocolate (duh, why didn’t I think of that when making Christian’s 2nd Birthday cake?!?), and that you use thin icing to ice cakes not thick because it pull up on the cake (mistake from Christian’s 4th Birthday).  I’m so excited to know that if I really just learn the proper techniques, what in the heck each odd looking tool is, and have the right materials, I too can make a good-looking cake.  What a relief.  I was really thinking it was just me and that I’m incapable of making something good-looking that you eat.

I’ve been practicing as much as I can and this is what I made last night…

june 2010 019

I still need a lot more practice but at least I forged ahead.  It took me about 4 hours from the time I pulled out the supplies until I had cleaned them up (I baked it the night before).  The icing started melting (thanks to AZ heat) and I still need to work on uniformity, straight lines, control…etc, but I think I’m getting better.


Here are some of my frustrating cake decorating experiences from the past four years:


#1   Here’s Christian’s 1st Birthday cake.  Look familiar?  Actually, I didn’t really end up decorating this.  I got all ready to do it, freaked out and let my wonderful sister-in-law Megan, who’s pretty dang good, take over.
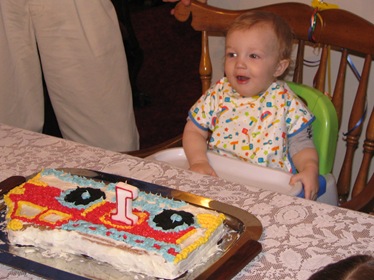
Christian'sBirthday (8) 


#2  This is from Christian’s 2nd Birthday.  He wanted a lion cake.

IMG_0090

Mistakes:

1) I didn’t find the pictures I had printed out of a cartoon lion before I starting to frost

2) I feel like a complete idiot about this, but I got brown and black food coloring at the store, started from white frosting, and worked my way up; only to realize later that chocolate is BROWN!!!

Now I know that if you start with chocolate black is faster to get.  It probably took me at least an hour to get the little amount I need to be black.

Review:

Honestly, this cake wasn’t that bad all things considered but it took forever to do and just made me frustrated when it was taking so long.


#3  This is Christian’s rocket-ship cake.  I think that my ideas are actually pretty fun but it’s my execution that stinks.  I used a #10 can to bake this cake and let me tell you, it took FOREVER just to bake (thank goodness I learned my lesson from the previous year and started two days ahead).   It looks a little more like the tin man’s hat than anything.  The icing was the problem on this one as was most everything.  I think if I did two #10 cans it may have worked better.  The icing on this just wouldn’t get smooth but now I know that I must have icing consistency problem.
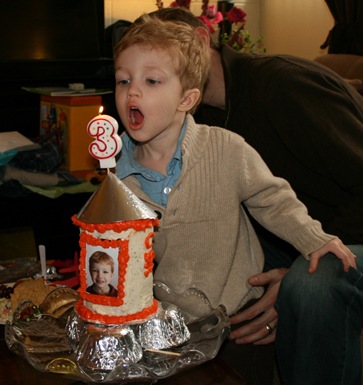
CHRISTIAN 3RD B-DAY cropped blowing candle


#4 Christian’s 4th Birthday was a “Book of Mormon Hero” theme so we used two 9X13 baking pans.  I sliced each one in half and then layered them on top of each other.  I used sandwich cookies for the rings and then used black piping gel for the lettering. 
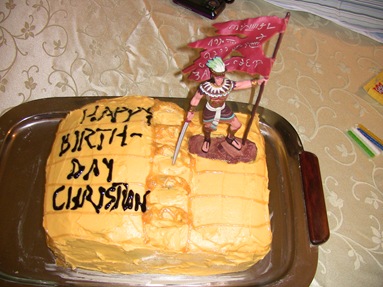
IMG_2365IMG_2370

Mistake:

The biggest problem with this cake is that it started falling apart.  I have now learned that you actually should add a little extra water to cakes in AZ as well as thin your icing a little more because it’s just too dry here and the icing started to pull up on a dry cake.

I’m really hopeful that these cake decorating courses will really help me.  Jared has been teasing me because I’ve been dreaming up all of these ideas for cakes since I started the class and my sleeping dreams are full of decorating cakes.  What can I say?  I get excited about something and it becomes an obsession until I get skilled.  I also have signed up to bring a dessert for the ward party this weekend and have begged my friend Christina to decorate her son’s 1st birthday cake next week. Hooray for extra practice that I don’t have an opportunity to eat!

Thursday, May 27, 2010

Infant Play Mat Combining Functionality and Design…

One of the things that I indulge in way too frequently is watching HGTV.  I don’t love all the shows, but I think the real problem is that as the ability to buy a house is approaching, I’m completely enamored in the idea of knowing what I want to do with my someday home.  Good grief, I’ve wished for a home since I was 14 and I asked my mom why she did something a certain way and she said “You do it your way when you have your own home”.  My favorite shows have designers staging or redecorating (I love “Divine Design”!).  Jared is a HGTV addict too but he’s much more interested in Holmes on Homes and the Home Buyers shows. 

One of the common threads that I’ve found in all this TV watching is that a lot of parents let their children’s toys overtake the main rooms of their homes.  In my parent’s home toys were banned from the front room.  This is fine and dandy if you have a family room as well as a living room.  But for those of us who have less space it’s tricky.          

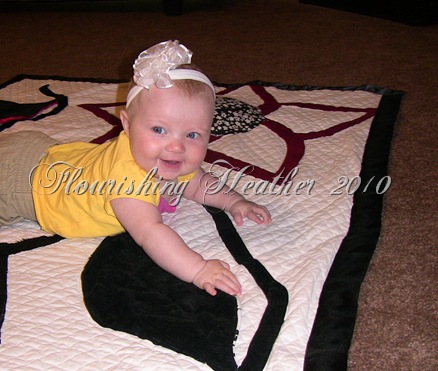
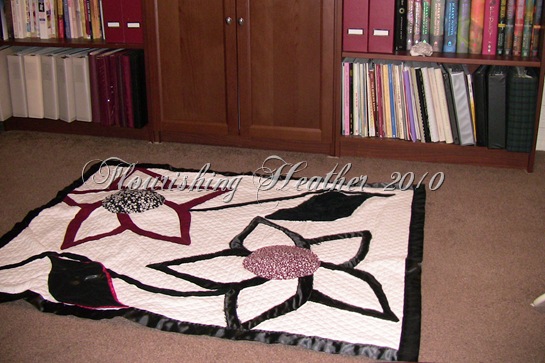
I came up with a wonderful solution… I designed a tummy-time play mat that uses the colors of my front-room and is a piece of art—using a bold contrasting pattern while mixing patterns and not being too garish—a visual delight.  I used a combination of cotton, velvet, valor, and faux suede to indulge the tactile sense. The leaves make crackle noises while the centers of the flowers squeak.

IMG_4342

Now my baby can play on the floor in happiness with lots of stimulation and my room still looks organized and modern.  I’m considering opening up an on-line shop to sell these.  I would customize them to match the colors of the room that they were made for (not necessarily the nursery colors).  What do you think?  Would you pay for something like this?  Or would you rather have a pattern and make your own? I am planning to design some that are more gender-neutral/masculine as well if this idea is well-received.  If you do like it, what would you pay for something like this? 

IMG_4361

Constructive comments would be very welcome.

Repurposing Store-Brand Box

IMG_4368   

When Vivian was born, I got a darling gift-set for her from a woman in our ward.  It came in an equally cute box.  The only problem was that it had the store name on it.

IMG_4365


Not a problem.  I Just added this…


IMG_4366

Now it is ready to hold her darling memorabilia!

Friday, May 14, 2010

Something healthy, easy and delicious…

I’ve been meaning to post this recipe for a while as it is one of my favorites and is really healthy.  When we lived with the 93-year-old woman who’s son and DIL were on their mission, part of the deal was that we have Sunday dinner together every week and then have the same thing for Monday night and then have a weekly game of scrabble.  She made the salads which was really great because I honestly hate to chop.  It has something to do with being a klutz and needing my fingers intact to play the violin…  So anyway, she introduced us to some very interesting, some very boring and some delicious recipes in the 18 months we lived there.  This recipe is by far my favorite one that she shared (I honestly am addicted).   I changed it around a little (as I do almost everything I cook).  What I really like to do with this is double it and have it for dinner and then for lunch the next day.  For those of you on diets, this is full of protein, fiber and good oils.  Bon appétit. 


White Bean Tuna Salad

2-3 Servings

-1 can white beans rinsed and drained well (or you can use dried that you’ve soaked overnight and boiled for at least an hour though I usually do two).

-1 can tuna  (Preferably Italian in Olive oil)
-1 cup of parsley, fresh, chopped (or to taste I usually only do about 1/4 cup)

-1/4 cup finely diced red onion (green onions are good too and then you only need 1-2 chopped)

Dressing:

-3 Tbs olive oil

-2 Tbs lemon juice

-salt and pepper to taste

Directions:

1. Rinse beans in colander until no foam appears.  Let drain, pat dry  with paper towels.

2. Drain oil from tuna and discard; put tuna in mixing bowl.

3. Add beans chopped parsley, onion, and gently combine.

4. In small bowl, whisk olive oil and lemon juice.  Gently mix dressing into salad.  Season to taste with salt and pepper.

5.  Will stay good in refrigerator for a day or two.

Saturday, May 1, 2010

Shopping the Sales: May

Here are some things that should be on sale during the month of May!


May

Boy’s clothing
Housewares
Handbags
Men’s clothing
White goods

Tuesday, April 6, 2010

Pretend Sheath or Scabbard Tutorial

So Christian has ruined a belt and two ribbons that he has tied around his waist and used as a sheath while playing prince and so I promised to make him a sheath or scabbard.  I think it turned out rather well.  I think the next time I try this I’d like to try real leather though because the nature of his play is a little rough if you know what I mean.  He loves his sheath and it’s the thing he always has on at home if he’s not asleep. :)

IMG_3038   

It wasn’t too difficult though I wish that my eyelet’s worked better…they didn’t set well into the material so they turned out to be just holes but they look pretty cool if you ask me (the holes I mean).  It gives it a rustic look.  I’ll get more heavy-duty eyelets made for belts next time.

Materials Needed:

Sword (for measuring)

1/4 yd faux-leather/decor vinyl or other sturdy material

thread

heavy-duty needles

scrap of contrast material


Method:

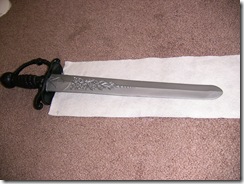
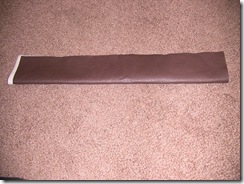
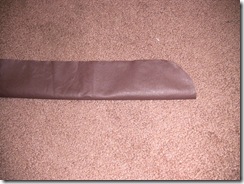
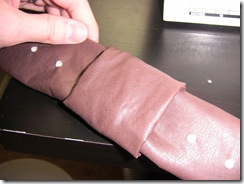
1. Place sword on material and fold over.  Leave at least 2 inches on each side of the sword.

 IMG_2678  IMG_2680

2. Fold bottom portion of scabbard in half and round off with scissors.

IMG_2681

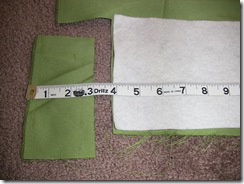
3. Measure contrasting material to match width of scabbard and cut to be 3 inches long.IMG_2682 IMG_2683

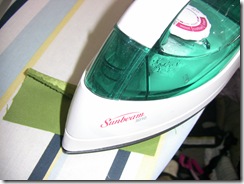
4. Fold bottom edge of contrasting material 1/2 inch.  Press.

IMG_2688

5. Pin Contrast over top portion of scabbard.

 IMG_2689

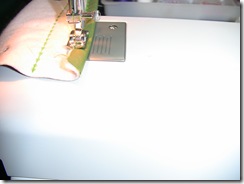
6. Sew in place using a decorative stitch if desired

 IMG_2691 IMG_2692

7. Cut remaining material to be 6 inches wide and 5 inches longer than waist intended for (i.e. waist was 20 inches so cut material 25”x6”).

IMG_2693

8. Cut a piece that is 6x5 for loop.

IMG_2694

9.  Mark belt starting 2” from edge every inch for four inches.

 IMG_2695 

10. Sew in female side of snaps at markings.

  IMG_2698   

11. Fold Belt in half and then overlap  (as a belt does) and mark where male side of snaps go across from female snaps.  Sew snaps at markings (no photo).

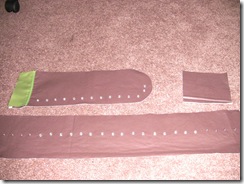
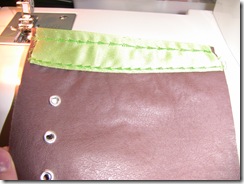
12. Should have all three pieces prepared.  Can embellish by adding eyelets, grommets, or holes. 

 IMG_2705 

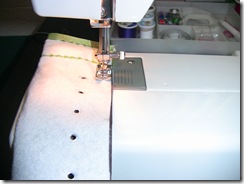
13. Fold over top edge of scabbard and sew in place (can use a decorative stitch if desired)

IMG_2707 IMG_2708

14.  With right sides together fold scabbard in half and sew along the side 1/2” away from edge. IMG_2709 

15. Fold belt portion in half right sides together sew 1/2” along edge. Turn over.

IMG_2725

16.  Fold in outer edge and hand sew with a heavy duty needle about 1/8” away from edge (this is very thick). IMG_2726

17. Sew top and bottom portion to area of belt desired (depending if you want it to snap in front, the side, and if it’s for left or right handed use).

IMG_2727

18. For loop portion, fold in half right sides together so that it measures 6x2 1/2 inches.  Sew 1/2” from edge. IMG_2728

19.  Turn out.  Sew raw edges together 1/4” from seam.

 IMG_2729

20.Turn and slide onto belt.

 IMG_2731 

21. Tada!   You’ve got a great accessory for your little prince, knight or solider!  IMG_3037


I just love this little guy.  He’s so expressive and isn’t he just totally made for drama?

Wednesday, March 31, 2010

Vivian’s Blessing Dress

As it turns out there is a nice learning curve to sewing.  When I made this dress I had never been very successful  making anything wearable before.  According to my friend that I gave it to it has received more complements than all of her daughters other dresses.  I thought that making Vivian’s blessing dress would be a difficult undertaking but it actually only took me about two days: one to cut and sew most of it and the second day for the finishing touches.

    IMG_2927

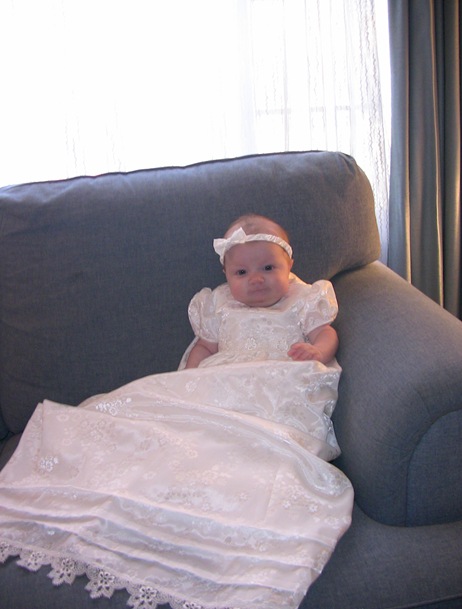
Here’s Vivian sitting on Grandma’s sofa on her blessing day.  I really love the ivory brocade satin that I found and the gorgeous Venetian lace that I found to trim it with.  I also got creative and made a pleated bow for her head since the bonnet  seemed a little overpowering for her little sweet face.

  IMG_2926 

Here she is with her daddy ready to go get blessed.      

IMG_2936 

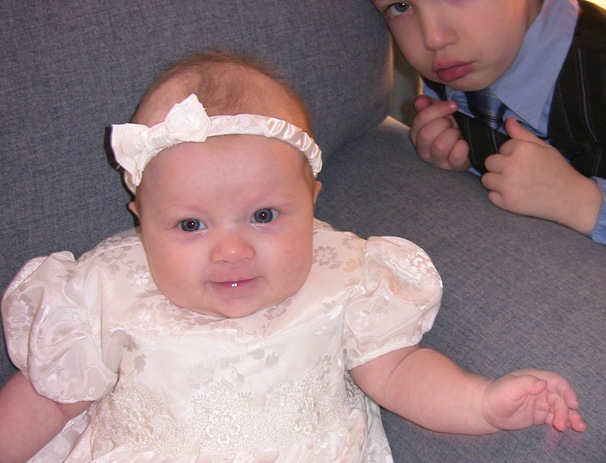
It’s a little difficult to see the bow detail because of the lack of contrast but I’ll make another in color at a later date and do a tutorial if anyone is interested.

IMG_2932

Here’s a pretty fuzzy though cute picture of her big brother trying to kiss her!